The Science Of Art: Parallel Compression

Following on from the last post on Serial Compression (back in 1872), I thought it would be good to post a guide on Parallel Compression. I was actually writing a post on mix bus (aka master bus) compression and thought it’d be a good idea to include this topic first as I might refer to it a bit in the next post. Click here for a handy overview of all 5 previous parts of the series on compression.

Random picture of some DBX compressors @ KONK Studios (London) so that you don’t glaze over from looking at all this text

Let’s get right into it: parallel compression is when you blend a compressed version of a track with the original track. That’s literally all there is to it, don’t let anybody scare you into thinking it’s more difficult or complex than that.

It’s sometimes called ‘New York style’ compression by people who want to make it seem like they are more elite than you and have top secret references and knowledge that you simply don’t understand.

It allows you to use to extreme compression settings without completely destroying the transients (aka the peaky out-y bits) of your source audio - that’s why it’s often used on drums, you can use it to bring out the room sound of the drums and the sustain of the cymbals - without absolutely trashing those spiky transients, which help give the ‘punch’. But you can use it on any source you’d like, of course (including the mix bus…). Simple, but cool.

Wet/Dry Blend Knob

Nowadays, most plugins have a mix knob or a way to blend the dry/wet levels (dry being the uncompressed or unaffected signal, and wet being the compressed signal), so you can achieve parallel compression just by tweaking this mix knob - you’re probably already doing it.

If you’re using a hardware compressor alongside your computer, you can use an I/O insert plugin to insert the compressor/FX, then there’s usually a mix slider on the plugin. Just be sure to hit the ‘ping’ button (other DAWs will have something similar), which will compensate for the latency introduced by the round trip out of your sound card and back.

There are a couple of other ways to achieve parallels compression that gives you a lot more flexibility: by ‘multing', and using sends.

Multing

Another way to achieve the same effect is to simply copy your track, compress the crap out of it, turn it down, then bring it up to blend it with the unaffected track. This is also sometimes called ‘multing' - e.g. splitting a guitar into compressed and uncompressed by multing the same guitar recording and sending one to a compressor blending the two sounds. And you don’t need to only use compression, you can EQ it, add FX etc, then blend it in with the original track.

Some people even ‘mult’ a vocal and split it into three using EQ - low end, mids and highs, treating them all differently and blending them all back together - but those people are usually mad.

This technique is cool as you can automate and add a bunch of EQ and other effects to the ‘multed’ track.

Send It / Go Full Send / Other Word Play

You can also use a ‘send’ to send the audio to a bus, and then compress that bus - you’ve probably already done this with reverb. For example, you could make a ‘smash bus’, that you send the kick and snare to, and blend that in a tiny bit with your original kick and snare. Or just the drum room mics for a section of the song. You can even gate the input, if you want. Go wild, it’s your party.

It’s a reference to Lost In Space, incase you were wondering

DANGER WILL ROBINSON

One thing to watch out for when using the last two methods: don’t get tricked into thinking it sounds better just because you’re added more ‘stuff’ to the original signal. Obviously if you take the original sound, duplicate it, compress the crap out of it and then blend it in with the original, it will sound louder because more is more. But you’re too smart to fall for that, I believe in you.

Adding a low or high pass filter can make a huge difference to the sound of the compressed track and can enable you to go way more extreme with the compression (or distortion, at this point). Remember that you can EQ the signal going into the parallel compressor, OR after the parallel compressor. Try chopping a load of low end off before it hits the compressor and compress really hard, then blend back in with the original…

Don’t feel the need to use loads of the compressed/crushed signal.

Finally, if you’re trying to use a tape machine or tape machine plugin to get tape compression, parallel compression might not work due to wow and flutter (when using a plugin, you might be able to turn this off) - but it will probably sound like a cool phase/flanger effect!

When Do I Really Use It Though

I tend to use it more with extreme distortion levels of compression (or just distortion/saturation full stop) or when the compressor or effect adds a bit of ‘colour’ - but I don’t want too much. I automate the effect in/out of sections a LOT.

In terms of pure compression, I use it when I ‘kinda like’ what the compressor is doing but know that deep down it’s detracting from the original source. So I’ll try to turn down the mix knob and see if I can have the best of both worlds.

Try It Backwards

Something I often try towards the end of a mix: if things are sounding a bit ‘squashed’ or I want more of e.g. a drum element, I’ll send some of the ‘dry’ drum - e.g. a kick and snare direct track - directly to a the master bus, bypassing the drum bus compressor. Because it’s hitting the mix bus and bypassing the drum bus compression and effects, it gives a completely different sound that can be really cool.

If you think about it, it’s a bit like the inverse of parallel compression - I’m adding more of the original signal on top of the compressed version. You can do this e.g. for just the choruses when everything kicks off once the guitars kick in and the snare gets a bit lost - you might need the snare to poke out more when the mix bus compressor is clamping down on the whole mix. You could automate up the ‘extra’ snare just on the chorus for a bit of extra impact.

Alright, this is getting a bit complicated now.

So anyway: parallel compression is when you blend a bit a compressed signal with the original signal and that’s it, go experiment and have fun with it.

Next up, mix bus compression.

With love,

Ed ❤️🎚🎛

Overview: Simple Guide To Understanding Compression

Random picture of some compressors that I took at Konk Studios in North London. I put these pictures in so people don’t get scared at the idea of reading all that text. Reading stuff is old school, analog, I like it. Before you ask: 1176 Rev F/G, EL…

Random picture of some compressors that I took at Konk Studios in North London. I put these pictures in so people don’t get scared at the idea of reading all that text. Reading stuff is old school, analog, I like it. Before you ask: 1176 Rev F/G, EL8 Distressors, and DBX 160s.

Oh hello there! I do hope you are keeping well. Given that a lot of us may well have a bunch of spare time on our hands at the moment, I thought I’d post up an overview of my ‘Science of Art - Guide To Compression’ series. If you’re home struggling to fill your time and are trying to demo some stuff or produce your own music, I thought it might be useful. I’ll be adding to it over the next few days/weeks.

If you’re a complete beginner, I should preface this guide with what a compressor actually does, which can be simplified into two main points:

  • It turns the loud bits of the audio down and the quiet bits up so that part is more 'even' in dynamics. This makes things sound more 'upfront' and less in the background (in the context of a mix).

  • Compressors often add some pleasant distortion/harmonics, so they colour the sound - often in a cool or dramatic way.

…and you can use them for either or both reasons. That's why people get can obsessed with different compressors - they can sound very different to each other and have their own personalities and signature sounds.

Onwards - here are the five parts that are currently available, along what they cover:

  • Part 1 - We cover the first of the basic controls of a compressor: the Threshold, Ratio, Attack and Release.

  • Part 2 - The Knee control (and how it’s different from the Attack Time), Gain Reduction and Make Up Gain.

  • Part 3 - Side-Chain Compression, the Side-Chain Input, and Compression Metering (Peak vs. RMS)

  • Part 4 - Find the ‘perfect’ compressor settings - every time. It's a method I was shown years ago and it's pretty cool.

  • Part 5 - Serial Compression - exactly what’s going on, and why you shouldn’t be too scared of using multiple compressors in series (one after another).

In the future, I’m going to add posts on other subjects: ‘parallel’ compression, ‘master bus’ compression, the difference between using a compressor on single/instrument tracks vs, the master bus and during mastering, the difference between various compressor types (optical, FET, etc), the settings on famous compressors and their common uses: the 1176, LA2A, LA3A, DBX 160, the SSL Channel Compressor and the venerable, SSL Bus Compressor. And other stuff too.

That's all for now. If you need any clarification on any particular aspect, or have a topic that you’d like me to do a post about, just get in touch and ask. I love talking about this stuff.

With love as always - stay home and be safe.

Ed ❤️🎚🎛

The Science Of Art: Serial Compression

ed (5).jpg

Ahoy - this time we’re talking about serial compression - exactly what’s going on, and why you shouldn’t be too scared of using multiple compressors in series.

Serial compression can be very straightforward: it’s simply 2 or more compressors in series, one after another, with each compressor carrying a little (or a lot) of the workload. It can be used on individual tracks, on the master, or on any busses - in fact it would be rare that any song released these days wasn’t run through a few compressors in series, during mastering.

Essentially, the reason to be aware of/understand serial compression is because you can achieve results with it that you just can't get with a single compressor.

For example, when mixing individual tracks, I’ll often use a fast-reacting compressor with a higher ratio first to catch the higher transient peaks and increase the ‘short-term consistency’ of the audio. Then I’ll follow it up with a slower compressor at a lower ratio to deal with more long-term level variations. This way, the second compressor has a smoother, more balanced signal to work on and won't ‘pump’ or ‘breathe’ due to a sudden burst of energy on signals with occasional loud peaks. I find it really helps with dynamic vocals and inconsistent bass guitar. The classic chain for this kind of thing is an 1176 into an LA2A.

This can often result in a more transparent, natural sounding compression, as well as reduce potential negative artefacts caused by heavy compression, such as treble loss, and/or plugin aliasing - some plugins can sound okay when doing gentle compression but kind of ‘fall apart’ when being pushed. You can also benefit from the colouration or ‘character’ that both compressors will impart on the sound.

However, using two or more compressors means it’s quite easy to over-compress…

Multiplicative Ratios!

Consider a vocal that’s been recorded through a hardware compressor using a 12:1 ratio, followed by two more compressors used in serial during mixing, with a ratio of 8:1 and 2:1. Now let’s say there’s also an SSL bus compressor on the master bus applying a 4:1 ratio (which is a totally reasonable scenario for a mix I might do). What’s the full potential compression ratio that this vocal track goes through?

The answer is…

768:1 (!)

The reason: Compression ratios are multiplicative when over the threshold: 12 x 8 x 2 x 4 = 768

Given that any ratio above 10:1 is considered limiting, 768:1 seems a ‘little extreme’, and that’s before mastering with more compression and limiting. Even with no compressor used during tracking, there’s still potentially a 64:1 compression ratio being applied to the vocal. So yeah… it’s easy to over-compress using serial compression.

To break it down and really help us understand it: imagine two compressors in series, both set at a threshold of -10dB, and both with a ratio of 4:1. Theoretically, this should result in a potential 16:1 ratio using serial compression.

So, if we imagine the audio peaks at -2dB (8dB over the threshold) enters the compressor:

    •    After 4:1 compression the signal is now only 2dB above threshold
    •    Compress again with 4:1 ratio and signal only goes 0.5dB above threshold

So yeah, going from 8dB (initial signal above threshold) to 0.5 gives a 16:1 ratio (because 8 divided by 0.5 is 16).

Real World Usage

But these figures don’t tell the whole story as, in reality, serial compression is rarely (if ever) done by setting the thresholds of the two compressors identically, so the aggregate ratio of compression is much more ‘fluid’. Additionally, both compressors probably wouldn’t have the same attack and release times, the same knee, and so on, so they wouldn’t always be acting on the same part of the signal.

I’ve never even used a Fairchild on a track that ended up getting released, yet here they are, in a picture, on my website.

I’ve never even used a Fairchild on a track that ended up getting released, yet here they are, in a picture, on my website.

Some of the signal maybe be uncompressed, some parts compressed by only one compressor, and some by both. Often the second one is releasing while the other is holding, sometimes one can be attacking while the other is attacking or releasing, so the interplay becomes quite complex.

So, the result of two compressors in series and both set to 4:1 - while theoretically identical to one compressor doing 16:1 - is usually an extremely non-linear form of compression, and one that could never be achieved by a single compressor set to 16:1.

Sonically, serial compression tends to be more transparent because the attack of the second compressor is often masked by the simultaneous movement of the first - and because the compression thresholds aren’t the same, the multiplied-ratio compression is performed on a smaller part of the signal than it would be if a single compressor were doing all the work. Read that again and you’ll see that it does make sense!

Obviously, there are no rules – you can place the slower compressor first, letting transients slip though, and then deal with them with a second, faster compressor! I do this all the time when tracking in my own studio, using a DBX 160XT (in over-easy mode) first as an insert, followed by an 1176. Or use two fast compressors, two slow ones, whatever. Take care not to over compress using this technique, just experiment and have fun.

As a parting bonus: you might find that when using serial compression on a vocal requires more de-essing than you’re used to applying. But that’s okay! It doesn’t necessarily mean you’ve ‘over-compressed’ if that’s what sounds good to you, and you want a really upfront sound. Just use the method described here to go in and turn down the sibilant parts - and you might even find that you need to use a de-esser somewhere towards the end of your plugin chain, as well. Don’t worry, if you think it sounds cool, then it’s all good.

With love,

Ed 🎚🎛❤️

The Science of Art: Finding the ‘Perfect’ Compressor Settings – Every Time

Yes, I do realise that it's been a while since I posted, but I've been very busy recording an album. Isn't that nice?

Anyway, when it comes to compression, the truth is that even some experienced engineers and producers can feel frustrated when trying to set a compressor – especially the attack and release times. A technique popularised by Michael Paul Stavrou in his book Mixing with your Mind (a very expensive but highly recommended book!) helps to overcome this.

The method is simple: using extreme threshold and ratio settings makes it easier to hear the effect of changing the attack and release times. The key step is to first apply the following settings to your compressor:

    •    Attack to minimum
    •    Release to minimum
    •    Ratio to maximum
    •    Threshold giving at least 15dB of gain reduction – preferably more

Loop up a piece of audio, such as a snare sample or drum loop you’re familiar with, and start to adjust the attack time until you can hear the transients poking through, and really understand and get a feel for the way that the attack works on the particular compressor you're using. Try to ignore the distortion and extreme compression and just focus on the attack transients; pay attention to when there's too much 'clamping down' on the transient.

Random picture of a compressor I took at KONK Studios

Random picture of a compressor I took at KONK Studios

I was going to included a screen capture video of myself, following the process with the built-in Logic X compressor, to show you how quickly it can be done - then I thought, you know what? Nah - you do it. You know? Okay, PERHAPS I recorded it several times, only to realise it wasn’t capturing the screen audio and would be useless to everyone, but let’s pretend that this is a lesson in tough love and DIY ethic.

Anyway, once you have the attack set to your taste, you can move onto the release. Listen for when it’s too fast and there’s too much distortion, or when extreme pumping occurs. Once the release is set move onto the ratio, and finally back the threshold down to give a more reasonable amount of gain reduction, and then set the make-up gain. How does it sound?

This is a great trick to try when you’re using a new compressor for the first time, and want to get to grips with it learning how it sounds and behaves. Be sure to adjust the settings in the following order:

Attack -> Release -> Ratio -> Threshold

According to Stavrou, you shouldn’t ever really need to go back and change the initial settings you chose, unless you decide to go for a completely different aesthetic. It’s a great technique, so give it a try! Bear in mind that different compressors sound… different! Some of them will behave in quirky, non-linear ways that you may or may not like…

You could do all that, of course -  or you could just get me to mix it for you, which will, of course, sound quite wonderful. 😎

Next up, we’ll talk about serial compression - chaining these lovely things together in a row for further awesomeness and sonic beautification.

With love,

Ed 🎚🎛❤️

The Science of Art: Understanding Compression - Part III

OK, we're going to be talking about Side-Chain Compression. It sounds confusing but it's not at all. It's a relatively long post, but just imagine it's the olden days, when people read books and listened to vinyl and stuff. Everyone's obsessed with tape and vintage gear, but nobody wants to read an article full of lovely, free information? Come come now, you know your brain and music will thank you for it later.

Erm, anyway. Grab a coffee. Let's discuss.

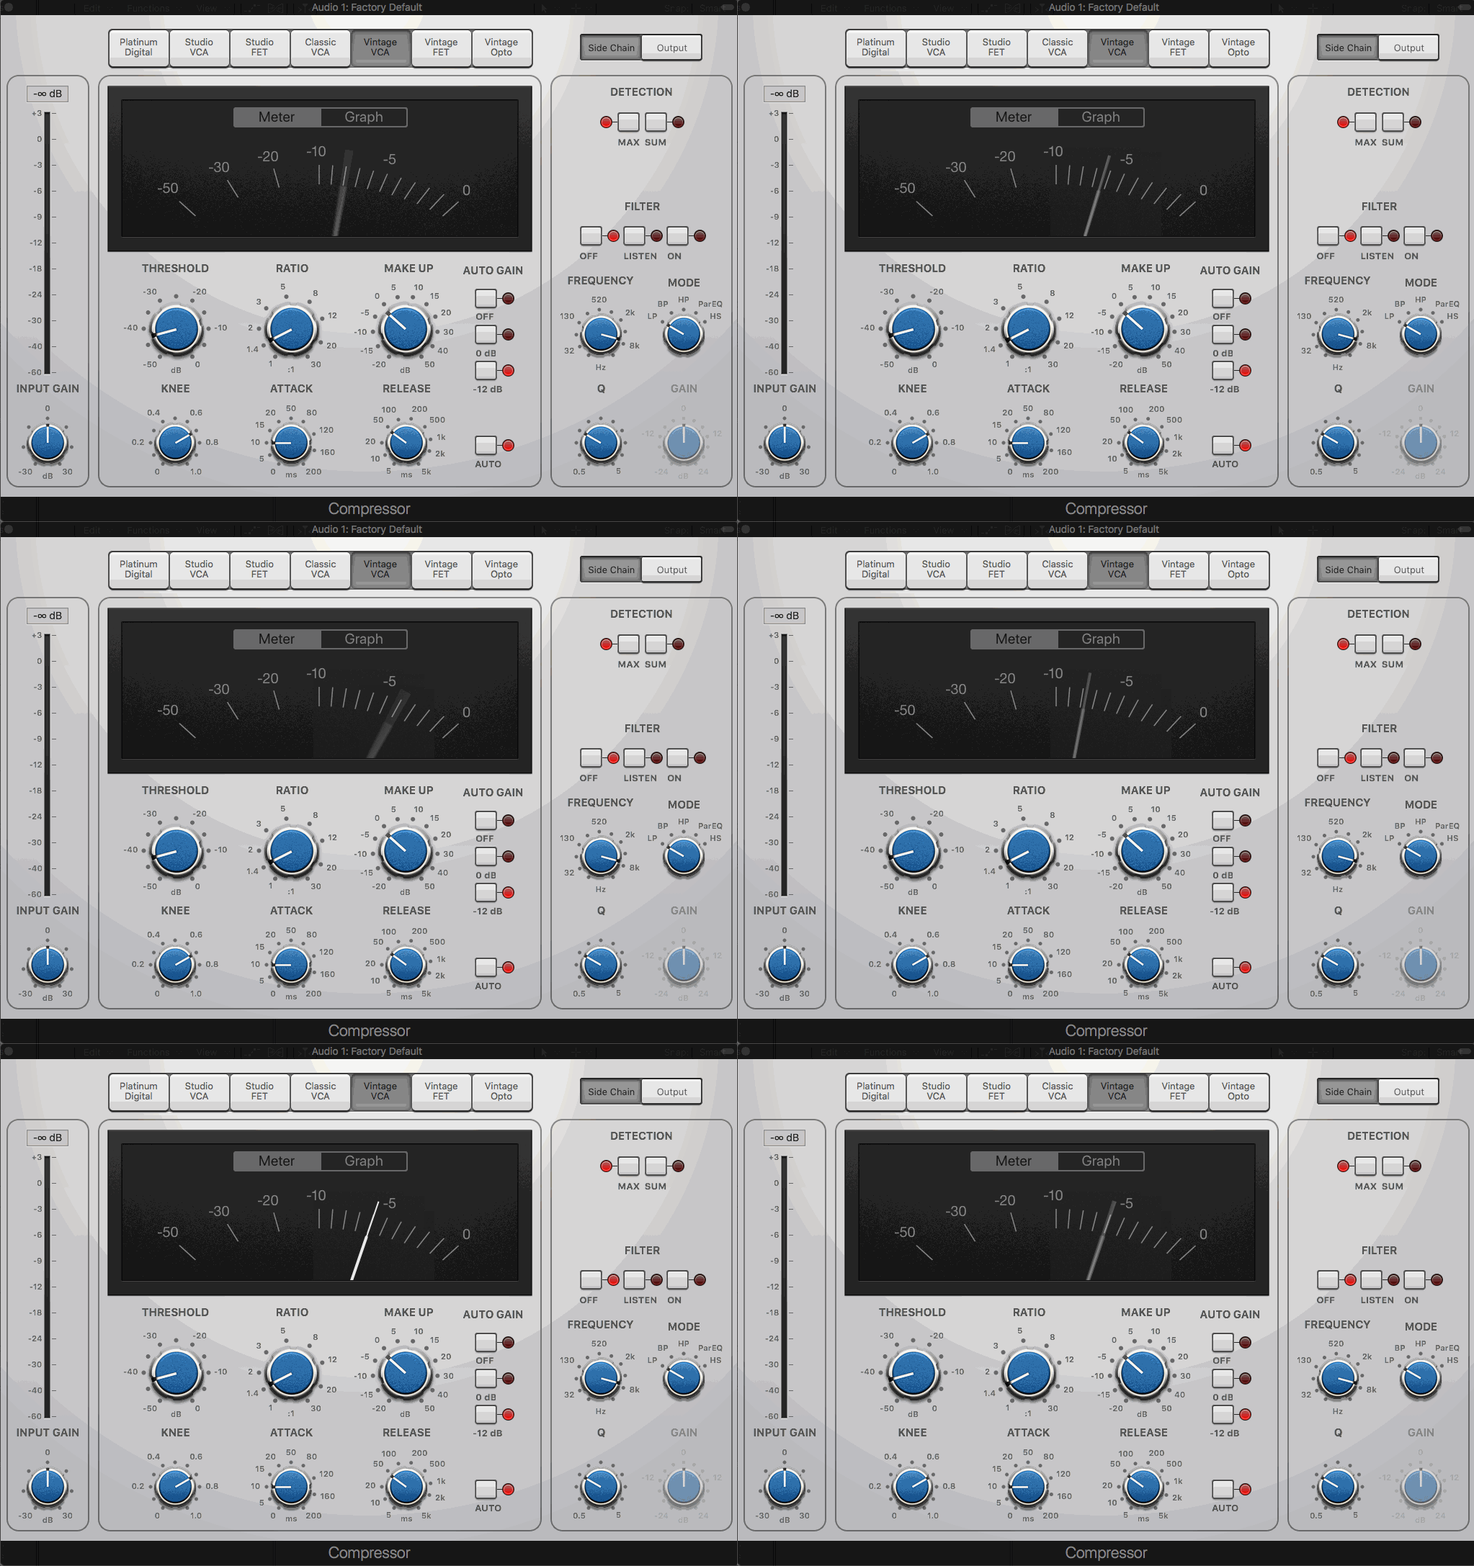
Setting up side chain compression in Logic and selecting the kick as the input signal to turn down the bass guitar - but only when the kick hits

Setting up side chain compression in Logic and selecting the kick as the input signal to turn down the bass guitar - but only when the kick hits

7. Side-Chain Input: So, if we're using a standard compressor (as discussed so far) the level of the audio going into the compressor is used to control the amount of compression; the compressor detects the ‘volume’ of the incoming audio, decides if it’s over the threshold or not, reduces the gain of that audio, and then outputs it. OK, easy, we're on the same page.

Side-chain compression works similarly, but the compressor has two inputs: one is the signal to be compressed and the other signal is used to control the amount compression. The "side-chain" of the compressor is the part of the circuitry that listens to the incoming signal to see if it should tell the compressor to... compress.

This can help to create the 'famous ducking effect’ or pumping sound used in electronic music – the kick is used as the side chain input, acting on the bass to ‘duck’ the bass sound (or perhaps all the instruments, if you want) while the kick hits, and then the music comes back in after the kick, helping create rhythm and groove (if the release is set correctly).

This can be used to... ahem, artistic effect as above, or it can be used simply to create more headroom and allow instruments to 'get out of the way of each other' – for example, if the bass and rhythm guitars are playing during a busy section in a mix and masking the kick and the snare, they can be ‘ducked’ a little in order to allow the kick or snare to bang through the mix a little more easily, as well as creating a little more headroom on the master bus (bonus!).

A cool and slightly advanced trick is to 'duck out' the rhythm guitars (or anything playing at the same time as the vocals) so that they dip out when the singer starts to sing. Go wild - you can even try using side-chain compression with a multi-band compressor and only compress the mid-range of the rhythm guitars when the vocals kick in! You only need a few dB for it to be worth it.

Additionally, using the side-chain gives you another important tool - it allows you to filter the input signal separately, before it is fed to the compressor. Using hi-pass and low-pass filters (see attached pic of Logic X compressor) you can compress the input signal, but only when the threshold is exceeded in the range of, for example, 10Hz - 100Hz. This way, when the signal has contains transients outside this frequency range, the compressor doesn't react. Get it?

Obviously, the settings you have on the compressor (Attack, Release, Ratio, Threshold etc.) will affect the character of the 'ducking'. The Release time might be the most important one here, as that will control the 'breathing' effect. Experiment. Stick it on 4:1, set the Threshold to give you -10dB of compression (i.e. enough so that you can hear it) and then experiment with the Attack/Release. You might like the Attack at the fastest setting.

Some compressors have a side-chain listen button that allows you to check which frequencies you're using as side-chain input (see the above GIF). If you push this, you send the side-chain signal straight to the output. Listening to this can really help you understand what the hell is going on.

Here is a picture of some compressors that I took at a session at Real World. It's just here to spice things up a bit, you know? Otherwise it's just a lot of text and people don't wanna read stuff these days. We need distractions. Plus, I think it l…

Here is a picture of some compressors that I took at a session at Real World. It's just here to spice things up a bit, you know? Otherwise it's just a lot of text and people don't wanna read stuff these days. We need distractions. Plus, I think it looks better. Spruces the place up, like a nice throw, some cushions, or a nice lamp.

8. Compressor  Metering - PEAK vs. RMS: OK, so we know that each compressor uses a side-chain circuit to measure the incoming signal, so that it knows when it needs compressing – it asks: ‘is the signal at the threshold, yet?’. But the important part to remember is that the compressor will behave differently, depending on whether the side chain detector responds to the average level of the input signal, or to the max/peak signal level of the input. What?

Well, some compressors can switch between Peak Mode and RMS Mode operations (don't panic, don't close the browser) – in Peak mode, the compressor responds more accurately to brief peaks in the audio - this ensures transients are more accurately controlled, but also introduces a risk that the output will be overly compressed if there’s a sudden loud, sharp transient sound. So Peak metering is usually used on drum and percussion sounds.

Most compressors use an RMS mode. RMS stands for Root Mean Square... which is *clears throat*.... "a mathematical means of determining average signal levels, which is designed to respond similarly to the human ear". Using a compressor in RMS mode means that the compression can sound more natural, but sharp transient sounds may pass through at a higher level than you expect, even with a short attack time. A great tip when working with RMS mode compressors is to use a limiter after the compressor to catch the transients, but be careful not to squash too much of the dynamics!

In the picture at the top (the Logic compressor) the options are 'MAX' and 'SUM' - which is the same as 'Peak' and 'RMS' respectively.

That's all for now. If you need any clarification on anything, just get in touch and ask. I love talking about this stuff. Next time, we'll talk about how to find the ‘perfect’ compressor settings - every time. I don't mean that in a spammy, click-bait way, it's a method I was shown years ago and it's pretty cool.

With love,

Ed 🎚🎛❤️

The Science of Art: Understanding Compression - Part II

Continuing from Part I where we discussed the Threshold, Ratio, Attack, and Release, this post is mainly about the Knee. It's a bit of a weird one, really - it's not a setting on all compressors and people can get it confused with its relationship to the Attack time. We'll also look at Make Up Gain. To start, here is a nice picture of a compressor:

I changed the picture to the white SSL clone compressor in Logic X and made it into an animated gif because I was worried that simply posting factual information would be too bland for the general public to consume. Needed to make it more flash to a…

I changed the picture to the white SSL clone compressor in Logic X and made it into an animated gif because I was worried that simply posting factual information would be too bland for the general public to consume. Needed to make it more flash to attract the moths. The barracudas.

So what the hell is the Knee and how can it be 'hard' or soft'?? Let's discuss:

5. Knee: This is how quickly the compressor ramps up to the full compression ratio.

With a hard-knee compressor, the signal is completely unaffected until it goes over the Threshold; from the Threshold on up, the signal is compressed according to the Ratio, and the full amount of gain reduction is applied as fast as the Attack time will let it.

A soft-knee means that the compressor will slowly ramp up the compression Ratio as the signal approaches the Threshold. Another way to think of it is that the Threshold is ‘spread out’ over a wide range and it gradually compresses more and more as the signal gets ‘hotter’. With a soft-knee compressor, once the signal passes the Threshold, the full Ratio that you set is applied, but because some compression is applied to signal as it's approaching the Threshold, the transition from no gain reduction to full gain reduction is smoother. The result is more transparent, less obvious compression (so, it can also seem harder to tell when the compressor is engaged and when it isn’t).

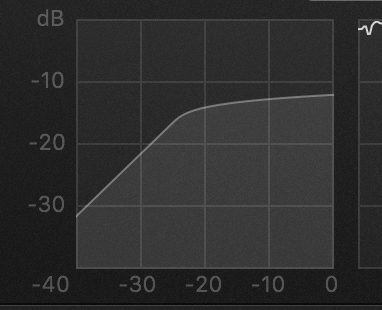
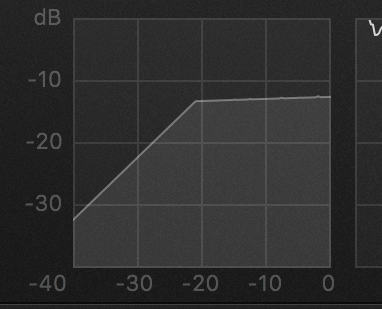
Check out the animation up on the right. This picture shows the settings on a compressor - the vertical axis represents the volume in dB - the horizontal axis represents the Threshold. On the horizontal axis, you can see that the threshold is set to around -21dB (so the compressor will kick in once the signal goes over -21dB). In one picture, there's a sharp fall off in gain, but on the other, there's a gentle curve, more of a transition. All that's happening here is that I'm changing the knee from hard (sharp transition), to soft knee, so there's a more gradual ramping up of the compression. You can see that in the 'soft knee' example, the curve actually starts before the threshold of 21dB, so you'll get some compression happening before -21dB on the meters! However, I didn't touch the Threshold setting when making this picture.

Some compressors give you the option of varying the Knee setting, and some don’t – in any case, experiment with what sounds good to your ears!

I find that a soft knee is nice on 'slower' instruments, so some bass, vocals, piano. Hard knee is great for things like drums or more percussive guitar, rap vox etc. But there are no results - I've used soft knee on drums and hard knee settings on vocals all the time. just mess with it a bit, see if you can hear a difference, and leave it where you think it sounds best. That's it.

A compressor I absolutely love is the DBX 160XT - this compressor doesn't give you any Attack and Release controls (partly why I love it - two less things to think about) but it DOES give you a 'hard knee' (the default) and a 'soft knee' setting (called 'Overeasy' mode) to give you a little control over how 'aggressive' the compression is. But does that mean that the a soft knee is the same as a slower attack? NAH MATE.

So how is the Knee different from the Attack Time?

Remember - the Knee has nothing to do with Attack or compressor timing (if the compressor’s Attack is set to 20ms, it will always be 20ms), the Knee has to do with varying the compression Ratio before the Threshold.

To illustrate, think of a compressor set with a 4:1 ratio, using a soft knee, with a threshold set to -10dB. So, when the signal reaches a level of -10dB, the compressor will be operating at a ratio of 4:1. But before the signal gets to -10dB, the Ratio will slowly increase. So, the compressor may behave something like this:

    •    When the audio signal's at -14dB, the compression ratio is 2:1
    •    When the audio signal's at -12dB, the compression ratio is 3:1
    •    When the audio signal's at -10dB or higher, the compression ratio is 4:1

At -10dB or higher, the full compression Ratio is applied. Of course, in reality, the Ratio wouldn’t jump up in such large amounts, but would be a gradual ramping up to 4:1.

If a hard-knee compressor were being used, there simply wouldn’t be any compression occurring at all until the audio had gone over the Threshold. With the soft-knee enabled, the compressor starts compressing as the signal approaches the Threshold.

So whatever the Knee setting or the current compression Ratio, the compression is still applied after how however long the attack time is set to!

Next up - once you've compressed the signal, it's really quiet. How do you get it back up to the volume it was at? Simple...

6. Make Up Gain: This is used to ‘make up’ the volume of the audio after the peaks have been compressed. Be careful not to be fooled by volume – we always think louder is better. Make sure to always check the real difference that the compression makes by setting the make-up gain so that the peak volume of the audio stays the same when you bypass the compressor. Bypass the compressor and switch back and forth between the compressed and uncompressed audio and listen for the difference, and decide which you prefer. You might be surprised that you prefer the original signal!

Q: If I’m getting 8dB of Gain Reduction and I use 8dB of makeup gain, why doesn’t the output level always match the input level – why is the output louder?

If you’re compressing a signal with sharp transients, and attack time is greater than 0ms, you’re letting the peak transients through and then adding the compressed tail and make up gain on top of that! You can’t always simply add 8dB of make up gain if you’re getting 8dB of gain reduction. Just use your ears, and check the meters too.

If you have any questions at all about any of this, or want to inquire about me mixing/mastering some of your music - just shoot me a email! We can even do a Skype/FaceTime Lesson to talk about this stuff if you like, it's all good fun.

OK, until next time, where we'll look at Side-Chaining and Peak/RMS metering...

With love,

Ed 🎚🎛❤️

The Science of Art: Understanding Compression - Part I

Yeah, we know that compressors 'reduce the dynamic range of the audio that’s passed through it blah blah' and yeah, they’re 'used in every mix blah' but they’re still one of the most misused and misunderstood effects available, and can be a bit daunting. Still, they are definitely the coolest sounding of all the gizmos.

So. I've written a series of posts that cover the basics of what each compressor setting does, gives you a quick tip on how to always set the ‘correct’ compressor settings, and gives you an introduction into a more advanced compression techniques like 'Serial Compression'. These are basically just the facts I wish I'd had when I was trying to understand how to use compression. I know there are YouTube tutorials and articles written on this already, but I intentionally wrote this to be a nice reference that you can refer back to when you feel that twinge of insecurity about setting one of those knobs. Once all parts of the series are out, I'll put it together in a free PDF that you can download and keep on your desktop. If you like, you can print it out and give it to your loved ones as a gift. You know, if you want.

If you want clarification on anything, just let me know and I'll find another way to explain it.

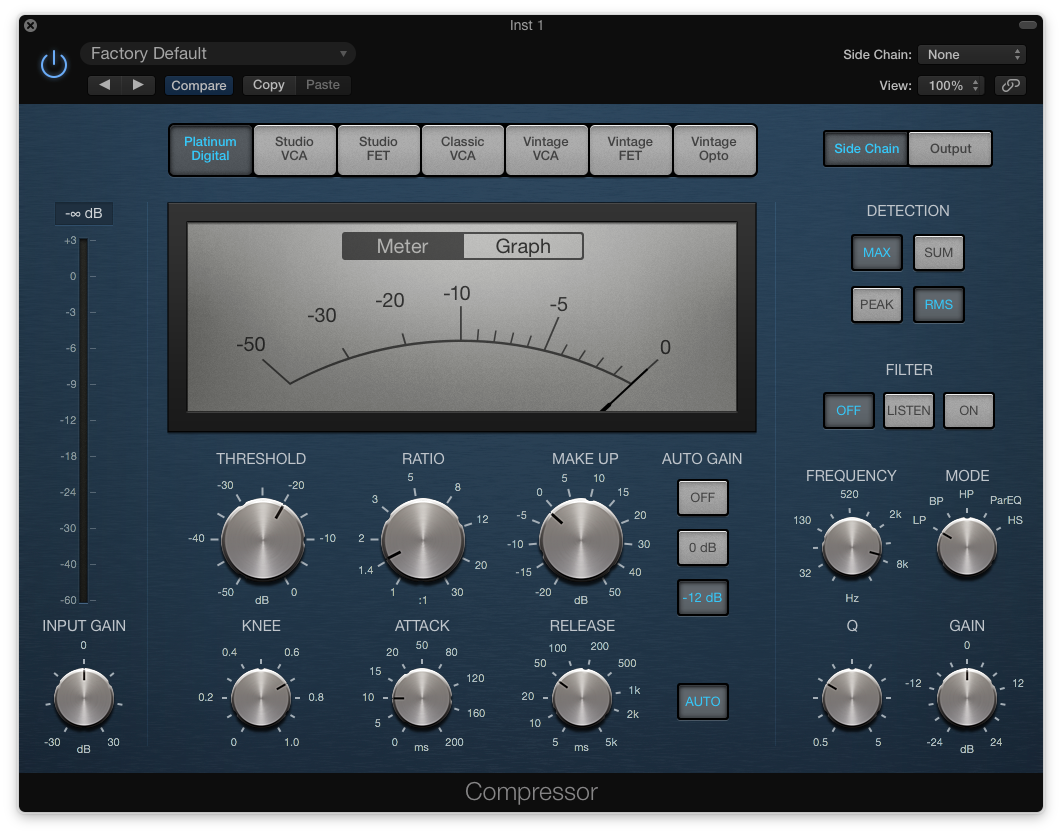
The stock Logic X compressor, which in all honesty I only ever use if I want to do some side-chain compression. It's probably because it's blue and a bit boring looking. Yes, I know the VCA, FET etc changes the colour, but it's too late for all that…

The stock Logic X compressor, which in all honesty I only ever use if I want to do some side-chain compression. It's probably because it's blue and a bit boring looking. Yes, I know the VCA, FET etc changes the colour, but it's too late for all that at this stage. My mind is made up.

Let’s recap the basics in 'real language' that normal people use - refer to the pic above to jog your memory of the common parameters. OK, let's go through what all (well, most) of those knobs do, yeah?

1. Threshold: The level (in decibels) at which compression kicks in. So, once the audio level goes above (is louder than) that level, compression kicks in and starts to make the audio quieter (assuming the ratio is above 1:1). Changing this has the biggest impact on how much compression is happening.

2. Ratio: This is just a way to explain how much the compressor is reducing the level of the audio; it’s the ratio of gain reduction between the output and the input. So, a 2:1 ratio means that once the signal goes above the threshold, the audio is reduced by half – so if the signal is 2dB over the threshold, the signal is reduced to 1dB. If the signal is 10dB over the threshold, the signal is reduced by 5dB. Ratios of 10:1 (or higher) approach limiting – a 10:1 ratio results in a 90% reduction in size!

3. Attack: This is the time it takes for the compressor to start compressing once the audio goes over the threshold that you set - set it too short and you’ll lose the ever-important transients (of course, maybe that’s what you want!). For most occasions, try to make sure that your attack time is long enough to let ‘enough’ of the transient pass through, especially on a drum bus. On the master bus or a drum bus, I like longer attack times like 30ms (with an SSL-style Bus Compressor for example, the slowest setting), so that the kick can come through and isn't 'clamped down' or becomes too thin.

4. Release: How long it takes for compression to stop once the signal is below the threshold. Setting this too fast can result in distortion (which can be cool) - too slow and you’ll run into pumping (or breathing). Pumping occurs when the compressor’s release time is long enough so that when the input signal is once again above threshold the threshold, the compressor is still acting and the incoming signal is compressed more than the previous transient (you might need to read that a couple of times). This causes the overall loudness of your track to fade in and out, creating a pumping effect. It generally doesn't sound great.

You may well find that using the same Attack and Release settings on different compressors sounds wildly different – so be sure to set these using your ears. Or the method that I'm going to outline very soon... 😎

With love,

Ed 🎚🎛❤️

The Science Of Art: Another Six Quick Mix Tips

To business:

  1. If you need more than 3-4dB of gain reduction on your master bus limiter to get up to a decent rough mix/mastering level, you’ve probably fucked up the balance of your mix (oops). Even if you're mastering 'for real though', the limiter shouldn't really need more than this even if you're trying to break people's ears - mastering compressors/saturation should take a lot of this load.
  2. Don’t be scared to automate up certain tracks (drum bus, bass, guitars etc) a dB or two on the chorus. Sounds like a lot of work? That's because you're lazy and useless and a bad person. Hell, you can even just do it on the master, a db or so, if you want. I mean, after all, you've gain staged everything so well, you have enough headroom to do that, yeah?
  3. If you want heavily compressed vox and a loud mix you’re probably going to need a hell of a lot of de-essing. That’s OK. Check my previous mix tip on how to do that properly here.
  4. Turn off your monitor occasionally when listening to the mix. If you have a control surface that lets you tweak levels etc while the screen is off, even better. Close your eyes at the very least.
  5. Don't worry about only putting reverb on sends. Insert it, insert it good, if that’s what sounds best.
  6. Feel free to cut the breath sounds and de-ess more on backing vox. I generally never remove breath sounds on lead vox, although but it’s OK to turn them down if they distract from the song/lyric - but backing vox breaths can make things sound messy. Often the backing vox will sound a bit too 'over done' in terms of de-essing when heard in isolation (but they'll never be heard like that so....) - or I might even cut the sibilant part out completely if it hits at exactly the same time as the lead vox. Don't worry about what it looks like, whatever sounds best, yeah?
  7. Bonus Tip: Get out the studio/garage/bedroom for a bit before the muse leaves you because you’re a lonely super nerd with no friends. I have no experience of this, but I know some guys who tell me it's a valid point.

With love,

Ed 🎚🎛❤️

The Science Of Art: Six More Mix Tips

Six more. Anything you want me to expand on, let me know, I'll do a post about it:

  1. Throw a limiter after an EQ if you’re doing a big boost to keep your levels from going crazy. Just make sure the limiter’s threshold is set correctly so that it’s actually doing something. I like to do this with the PSP VintageWarmer - it's a very coloured limiter and it's very easy to overcook it. But like, just don't do that, you know? With the VW, I simply adjust the 'ceiling' knob and leave everything at default. Just see if you like it when a limiter is 'soaking up' the boost you just did with the EQ, and keeping the levels under control.
  2. Write down the specific areas to correct before revisiting a mix to do revisions - whether they're your own mix notes or a client's. Correct them, bounce the mix, send it to the client, and move on - otherwise you’ll be tweaking forever. If you need to do more, repeat the process, like a robot. Don't get caught in a loop. If the mix realy sucks, do it again.
  3. 'Mix references' are *usually* bollocks. It’s a different song by different people (that's also been mastered), so don’t get caught up trying to copy stuff. Chances are it'll just confuse you and it’s better to just really know your monitoring environment. Use them sparingly; for mastering, they can help you match a healthy overall loudness level, and if you go to a new studio (whether that's Abbey Road or your mate's garage), then a familiar song can help you understand the monitoring environment. But that's about it.
  4. Limit your options. Have a few go-to staple plugins that you trust and know backwards. Too many options will just eat productivity. I mainly use plugins from PSP, SSL, Slate and a few of the stock Logic effects (love the Channel EQ). I'll have 2-4 different options for each effect type - EQ, reverb, compressors, etc. With my go-to options, I can probably sort 90% of mixes, regardless of the genre. As you gain more experience, you might try out a new plugin and if you like it, you can add it to your staple plugin list - perhaps discarding one of the older ones. The same goes with (software) instruments, really. Scientists have concluded that you can be stuck dicking around with NI Komplete for up to 45 years.
  5. Gain stage everything correctly. Plugins or outboard, doesn’t matter. Make sure the level going in and out of each plugin is under control. This is huge. Just do it.
  6. Don’t be scared to chain a couple of compressors on the same channel. Two plugins doing 3dB of compression is probably going to sound more transparent (if that's what you're after) than one doing 6dB. I'll often use a bunch. Same goes for limiting. Mix the colours. Don't tell anyone.
  7. Bonus Tip: It takes fucking ages to learn how to mix/be a "Mix Engineer", before you really know your arse from your elbow. This is time you will need to take away from some other activity: writing songs, rehearsing, practicing, playing/organising shows, doing band admin/social media stuff, spending time with loved ones (jk) - and if you don't have much of a life, you could be off pretending that you have one on social media. DO YOU REALLY WANNA DO THAT THO. Do you want to make that 'sacrifice' and is this the best use of your time - or is it just ego so that you can say that 'you did it'? Budget comes into it too, of course, but if you're going to spend your money somewhere, you'd be MUCH better offer getting someone that knows what they're doing to mix your tracks, and then mastering them yourself. If they mix them properly, you'll likely only need to slap a limiter on them to get the level up. Don't believe the mastering hype. It's not black magic.

That's all. Party on 🤘🏻🤘🏼🤘🏾🤘🏿

Ed 🎚🎛❤️

The Science Of Art: Six Quick Mix Tips

Boom, no time to mess around, here we go: 

  1. Songs with ‘fat bass’ often actually have way more mid range than bass. If it sounds big and ‘buzzy’, it’s all about the mid-range. It's all about the mid-range in general - bass and treble are for kids.
  2. High pass filter everything that doesn’t need to have any lows in it. Just do it. I bet it sounds better.
  3. Don’t forget to low pass tracks to cut off unneeded top end sizzle. Cutting top end off (drum) room mics is often pretty sexy.
  4. Turn everything down. In the digital world, red is (almost always) just bad. Make sure all of your tracks are recorded @ 24-bit and with a ton of headroom. All channels shouldn’t be clipping when faders are at 0, especially the master fader. Get your tracks PEAKING at -6 to -8dBFS and everything will sound grand.
  5. Work hard to learn to interpret what people REALLY mean. Sometimes ‘this needs more bass’ actually means ‘there’s too much treble’. ‘Turn down the harsh top end’ can mean the 3-4KHz area, not 10KHz+
  6. Chorus (the effect) isn’t just for Spandau Ballet lovers (like me). Use them with a low LFO rate to get super wide stereo sounds. I recommend Soundtoys' Little MicroShift, an Eventide H3000, a Yamaha SPX90, or simply the stock Logic chorus plugin (Super Wide preset). I'm sure whatever you have in your DAW will work fine. Mono -> Stereo, slow LFO speed, bosh, sorted.

There. Enjoy.

Ed 🎚 🎛  ❤️

The Science Of Art: Tip #0003 - Narrow EQ Cuts Will Save Your Life & Make You Rich

Tip 3.) Cut down on nasty/harsh ringing in the 3-4KHz area - it can/will make your tracks sound sharp and amateurish. Learn to work with an EQ band set to a super narrow Q (Q = EQ bandwidth) to hulk smash horrible frequencies; it works great on drums (video ex.1: drum room mics), guitars (video ex: 2) and especially lead vocals (video ex. 3).

Obviously you could automate on/off on certain sections, or adjust the gain/amount of cut on certain sections (e.g. the singer sounds fine until they start belting it out). The EQ curve might ‘look wrong’ but it often sounds fantastic, especially if you have a frequency hunter EQ like PSP Neon (used in the below example) or FabFilter’s Pro-Q; experiment with Linear Phase EQs, too. I’ll dip out 20dB on a lead vocal, no problem - I'm fearless, like a tiger. Try it. Don’t be scared homie. 🎚 🎛 ❤️

The Science Of Art: Tip #0002 - De-Essing Vocals

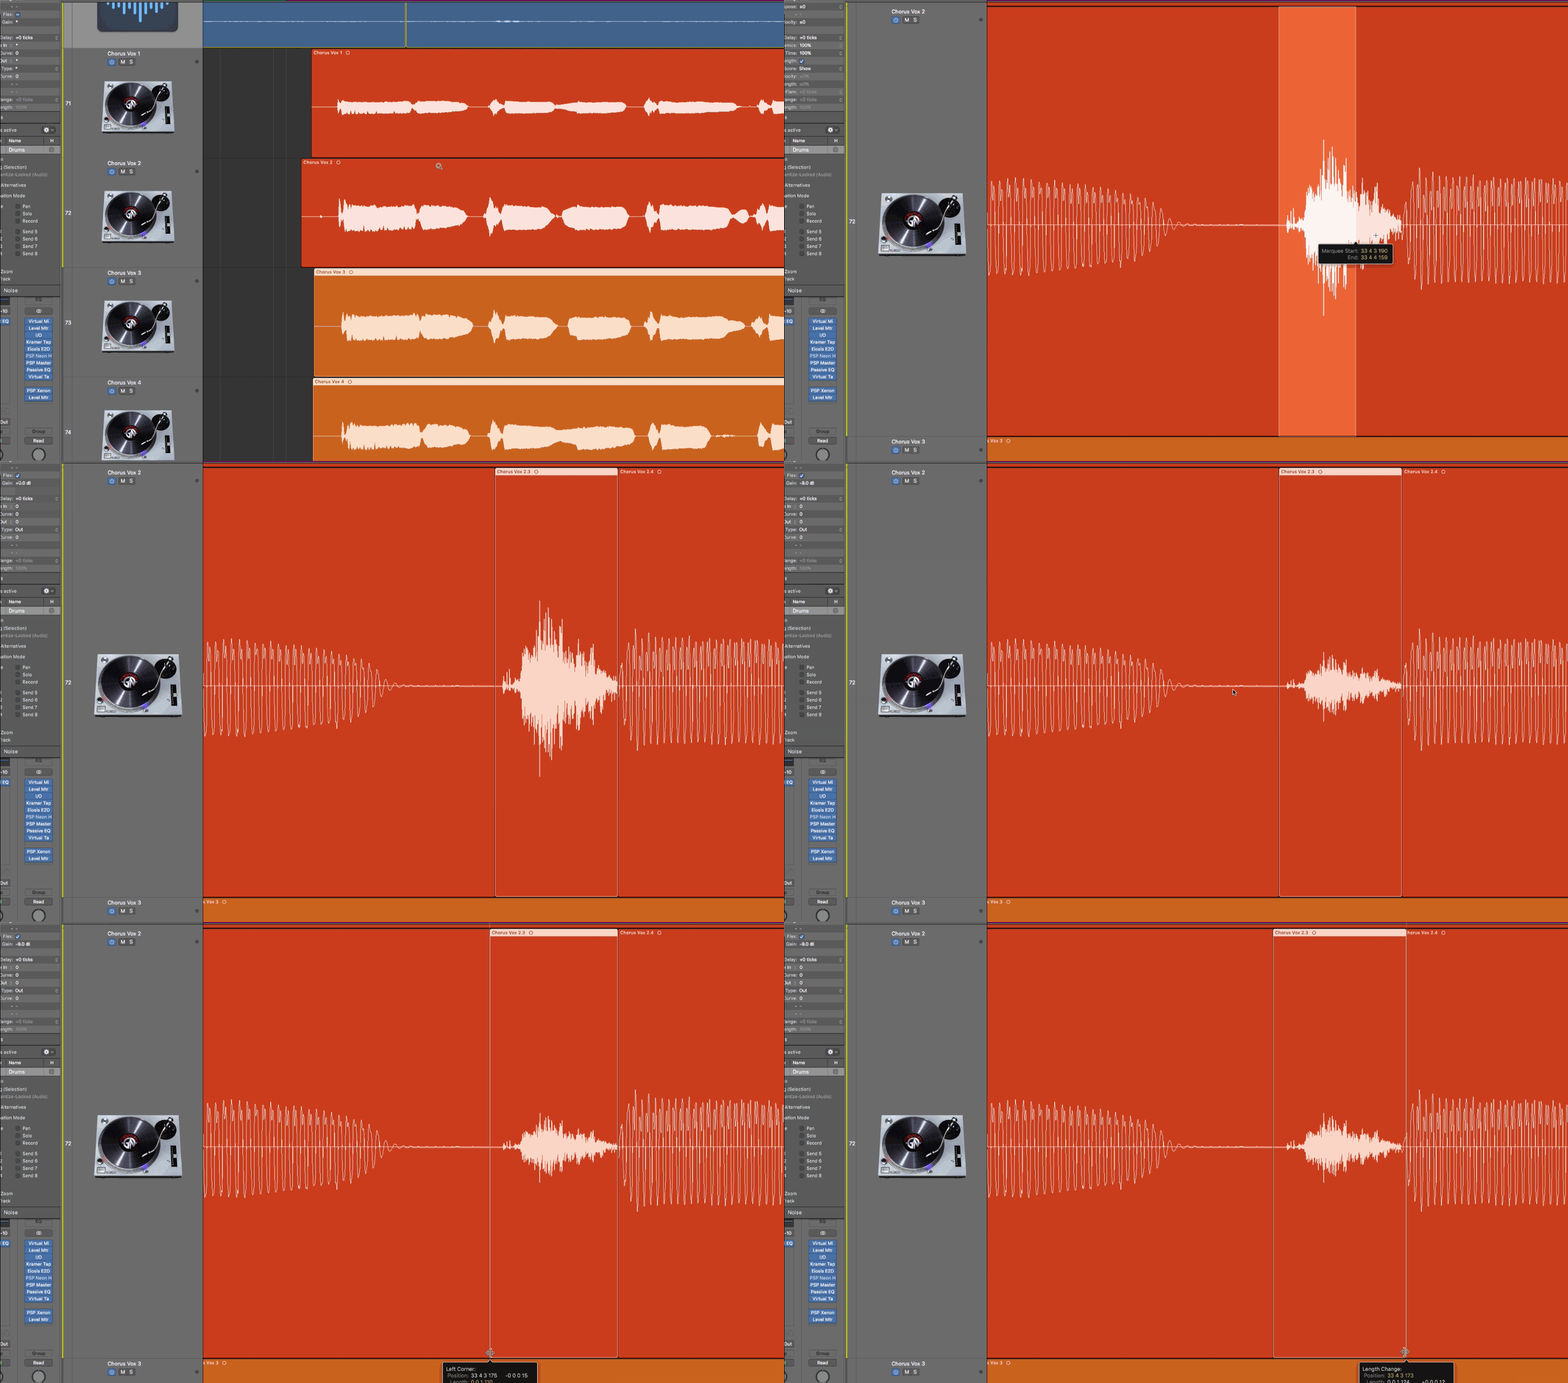
Tip 2.) De-ess vocals the grown up way: manually zoom in on the waveform and chop out the ssssibilant parts (they’re easy to recognise, as you can see from the GIF below) and reduce the clip gain on that region - around 6-8dB is usually a good starting point. You might need to apply a little crossfade to address any clicks/pops when overlapping the normal region. A little more time consuming, but by far the best method. You can probably get a whole track done in 10-15 minutes once you become proficient - rap vox may take a little longer. Don’t be lazy.

Of course, this will be ‘pre-inserts’ (i.e. before your plugin chain), so if you’re using a lot of compression and/or distortion, go right ahead and try a de-esser plugin near the end of your chain, too. 

Finally, be sure to check the sibilance once a ton of compression has been applied to the lead vox, as well as on the master bus. Once the song compressed and limited, it will become a lot more apparent.

With Love,

Ed  🎛🎚❤️ 

The Science Of Art: Tip #0001 - Side-chaining

Tip 1.) Side chaining: not just for crazy electro kids with the UNF UNF UNF UNF and the donks. Use it to knock a couple of dBs off your bass line when the kick hits, helping it cut through and keep your master bus from exploding. Used subtly it won’t really be noticeable, and you could even use it so that you can make your track louder overall - but I am hoping that you use these tips for good and not evil.

It doesn't have to be much:

With Love,

Ed 🎛🎚❤️ 

The Science of Art: Tip #0000

A little while back I started jotting down a bunch of short mixing/mastering/song-writing and production tips that I’ve learned over the past few years. I thought it might be a nice idea to share these, one or two a day, until the end of time. Perhaps I'll even post them all in one post, one day.

I know that there are tons of other accounts (Twitter, blogs, etc) that do this and I’m not trying to suddenly pretend to be some sort of sage on music creation. Some people aren't following me to try to learn how to make music, and yes, social media is gross. But if one of them help anyone, then hopefully it's useful. I do hope that's OK with you?

Really, I created these as reminders for myself - I still look at them all the time when I’m struggling - but perhaps they’d be useful for anyone that makes music and cares to read them. They’re might be a specific piece of direct advice/suggestion, or it could be an Eno-esque Oblique Strategies style snippet, to encourage a bit of thought and intentionally left open to interpretation. Context is not required/lack of context is encouraged.

I do hope you find these useful - if you’d like me to expand on any of them (I'll go as in depth as you like, and post it here, with examples), just get in touch: ed@edboogie.com

Have fun and make great music ❤️ 

Ed